
Nutrition
Ingredients
Cheesecake Filling
- 22 oz Extra Firm Silken Tofu I used Mori-Nu
- 1 cup Powdered Sugar
- 20 – 25 Maraschino Cherries small dices
- 1 tbsp Vanilla Extract
- 1/4 cup Flour
- 1/2 tsp Baking Powder
- 3 tbsp Tart Cherry Powder
- 1/2 tsp Salt
- 1 serving Vanilla Protein Powder
- 1/3 cup Mini Chocolate Chips
- Pink/red food coloring (just a few drops)
Crust
- 1 1/2 cup TVP Textured Vegetable Protein, do NOT re-hydrate TVP.
- 3 tbsp Ground Flax Seed
- 9 tbsp Water
- 4 tbsp Brown Sugar
- 3 tbsp Cocoa Powder
- 1/4 tsp Salt
- 1 tbsp Flour
Instructions
- Pre-heat oven to 350 F (177 C).
- In a small bowl, whisk together 3 tablespoons of ground flax seed with 9 tablespoons of water. Let sit for a minimum of 5 minutes.
Making the Filling
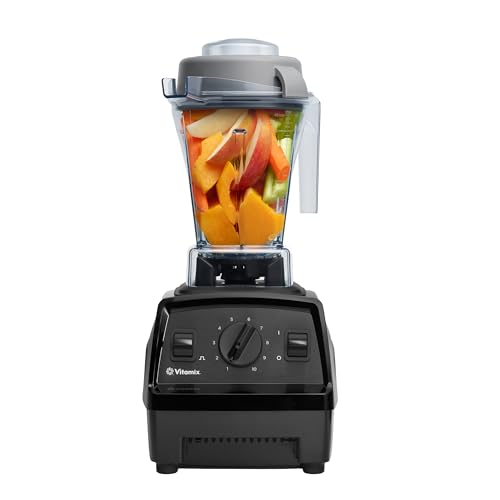
- In a high powered blender, blend the tofu until very smooth and creamy.
- In a large bowl, pour tofu out of blender. Stir in the vanilla.
- Sift the powdered sugar and the protein powder into the bowl (if you don't have a sifter, you don't necessarily need to sift these ingredients, I just think it makes the filling creamier and smoother). Whisk together well.
- Add in the flour, tart cherry powder, baking powder, salt, and a few drop of food coloring. Whisk together well until it is creamy and well mixed; there should be no lumps.
- Stir in the small cherry pieces and chocolate chips.
Making the Crust
- In a medium size bowl, mix all of the ingredients listed in the crust section together. I literally just used a fork and make sure everything is very well mixed.
Assembly
- In your pie pan, dump your crust "dough" and evenly smooth it out on the bottom of the pan and up the sides.
- Pour your cheesecake filling on top of the crust and smooth out evenly.
- Bake in oven for 40 – 50 minutes. Should be pretty firm when it's done with a slight jiggle left in the middle of the cheesecake.
- Let it cool at room temperature (on the counter) for 2 hours.
- Move to fridge for another 2 hours until completely cooled down. Then serve!
Equipment
This section may contain affiliate links

Notes
Gluten-free Option
- Use a 1:1 gluten-free flour (affiliate link) in place of flour. I’ve had good luck with this one for baking.
Reduced Sugar Option
- Use a 1:1 powdered sugar alternative (affiliate link) in place of the powdered sugar. I typically use this monk fruit option.
- Use a 1:1 brown sugar alternative (affiliate link) in place of the brown sugar. I typically use this monk fruit option.
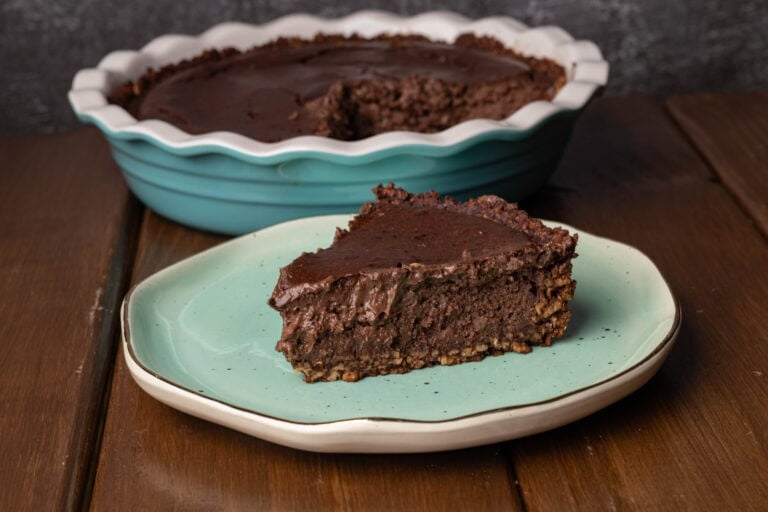
My high-protein cheesecakes are probably my most controversial recipes. You’re either going to think I’m a genius, or you’re going to think I’m committing kitchen crimes in Indiana. I, personally, think I’m a genius for this one, because I actually tasted it and it was amazing! For the cheesecake filling, we use silken tofu as the main protein source. It works surprisingly well and sets up nicely when baked; it ends up nice and creamy.
And here’s where the real controversy arrives, I use TVP for the crust. A lot of people on the Internet seem very bothered by this; one nice fellow told me it was cursed as shit, but he didn’t try it so what does he know? 🙂 But, trust me, TVP crust actually works shockingly well. I, too, thought this was an insane idea and was so excited with how it turned out! Also, we add sweetness to the crust and cocoa powder so you can’t even tell it’s TVP. But if you want to start off easy and just do the silken tofu cheesecake filling, this will still be pretty high-protein. You could just use a cookie crust to make sure you like the filling. Then once I have earned your faith and full confidence, you should come back and try this with the TVP crust!
I, personally, think this is a really cool recipe because easy-to-make and great for meal prepping. It doesn’t take very long to make and doesn’t require any super amazing kitchen skills like most cheesecakes do. For this recipe, we just kind of blend stuff and mix things. A very non-intimidating cheesecake recipe. I really like to cook this on the weekend and have a piece each day for a snack!
My partner tells me that high-protein cheesecakes are a thing in the weightlifting community, so if you’ve had high-protein cheesecakes before you might like this! I’ve known a couple non-vegans that made this because they were looking for a high protein dessert, and even they loved it! You could also make this without a crust if you’re just not interested in having a crush at all. If chocolate cherry cheesecake doesn’t sound appealing to you, but you are still interested in trying a high-protein cheesecake, I have some other flavor options you might try instead – highly recommend the Triple Chocolate Cheesecake and the Peanut Butter Chocolate Chip Cheesecake!
Ingredients
Cheesecake Filling
- Extra firm silken tofu – I used extra firm silken tofu for this. The brand I typically use is Muri-Nu. Most grocery stores carry this, usually near the international food aisle. Since it’s a shelf-stable ingredient, you can buy it online as well. There are other types of silken tofu, including ones that are refrigerated. Most of those are not extra firm, so I’m not positive how they will set up in this recipe, or if it’ll be any different than how the extra firm worked. My advice would be to use the extra firm if you can find it, but if you can’t find extra firm and still want to try this, please let me know how it turns out! Just make sure you’re using silken tofu if you want it to be a smooth and creamy filling.
- Powdered Sugar – I used powdered sugar for this. I would recommend using powdered sugar as opposed to white sugar or brown sugar, because it helps the filing be a little bit fluffier. If you’re trying to cut back on sugar, you might be able to substitute this with some kind of sugar alternative, but I haven’t tried that, so I don’t have any great recommendations. If you do come up with a really great way to make this reduced-sugar, please share your awesome discoveries in the comments!
- Maraschino Cherries – I used maraschino cherries in this recipe; you know the ones that you find a little jars. I would not recommend regular cherries. I think you definitely want something a little bit sweeter for this recipe. Also, does anyone else just snack on Maraschino Cherries when they want something sweet but are too lazy to make a dessert?
- Vanilla extract – measure with your heart.
- Flour – I used all purpose flour for this recipe. I don’t bake much with gluten-free flour, but if you’re trying to make this gluten-free, I think you could probably use gluten-free flour, and it could work fine. If you do happen to make this recipe gluten-free, please share how your gluten-freegan wizardry in the comments!
- Tart Cherry Powder – I found this tart cherry powder online. I like using this because I think it gives it even more cherry flavor than you get from the maraschino cherries. I know it’s kind of a specialty ingredient, but if you can find it, I do think it makes it taste a lot more flavorful.
- Vanilla Vegan Protein Powder – I used Orgain vanilla vegan protein powder for this recipe. There are plenty of other good protein powders that you could use for this. I think you should focus on one that has a more subtle flavor, which is why I chose Orgain. We’re using protein powder in this recipe to add some more sweetness and also some additional protein. If you’re going to leave out the protein powder, you probably want to add a little bit more powdered sugar to make up for the sweetness that would be lost.
- Vegan chocolate chips – I like to use Enjoy Life mini vegan chocolate chips. These are the ones I am most likely to find them a grocery store. If you have another brand that you like better, feel free to use those instead. I prefer to use the mini chocolate chips, because it seems like I’m able to get a bite of chocolate in every bite if I use them!
- Pink/Red food coloring – I use just a pinch of red food coloring to get a nice, bright pink color in the cheesecake filling. Y ou do need to be careful when you’re purchasing food coloring, because some of it is not vegan. This is also optional; if you don’t want to make it look more pink, you don’t need to use this.
Crust
- Textured Vegetable Protein – TVP – OK, this is probably the weirdest ingredient we’re going to use in this high-protein chocolate cherry cheesecake, but trust me, you’re going to like the macros and you’re not even gonna notice we use TVP in the crust! If you haven’t worked much with TVP before, it is a vegan protein source that is made of de-fatted, soy flour. It’s a shelf-stable ingredient that you can find at most grocery stores, typically next to the gluten-free flour options. I really like the brand Bob’s Red Mill. You don’t often see TVP being used in baked goods, but I think that’s unfortunate because it can add a lot of protein without actually adding any weird flavors. If you’re a little skeptical about using TVP in the crust, as I said earlier in the post, you could just use a cookie crust. If you’re trusting me on the TVP crust, though, we are going to be using dry TVP and flavoring it with some cocoa powder and a little bit of sweetness.
- Ground Flax Seed – I used ground flaxseed for this, and I think it’s really important to hold the TVP together for the crust. If you haven’t done much with ground flaxseed, this is a commonly used vegan egg substitute for baking. It’s a shelf-stable ingredient that you can find in most grocery stores and you can also buy online. It’s very easy to use; we just mix it with water, let it sit for about five minutes and we end up with a gooey substance that will hold the TVP together for this recip!
- Brown Sugar – I use brown sugar to sweeten up the TVP crust. If you’re trying to reduce your sugar, you should still definitely use some kind of sweetness for this recipe or the crust is not gonna taste very good. If you happen to make this a low sugar recipe and substitute something else with for the brown sugar, let me know what you did!
- Cocoa Powder – I used cocoa powder in the crust because I think it added a good flavor and helped cover up any TVP taste. It also works well with the cherry flavor of the cheesecake filling.
- Salt – adjust to taste.
- Flour – I just use a little bit of flour in the crust. Since this is such a small amount, I think you could pretty easily swap this with your favorite gluten-free flour option!
Instructions
Pre-Steps
- Pre-heat the oven to 350 F (177 C).
- In a small bowl, whisk together 3 tablespoons of ground flaxseed with 9 tablespoons of water. Let it set for at least five minutes to create a goo.
Making the Filling
- In a high powered blender, blend the silken tofu, until it’s very smooth and creamy. Since we’re not adding any additional liquid to this, you will probably have a couple of spatula interventions while trying to get it smooth.
- Pour the blended silken tofu out of the blender and into a bowl. Whisk in the vanilla.
- Next, we are going to sift the powdered sugar and the protein powder into this bowl. If you don’t have a sifter, you don’t necessarily need to sift these ingredients, but I do think it makes the filling creamier and smoother. Mix all of these together. I like to use a whisk for this part. You could also use a hand/stand mixer if you don’t want to do the mixing by hand.
- Add in the flour, tart cherry powder, baking powder, salt, and a few drops of food coloring (optional). Now, whisk this all together really well until it’s creamy and very well mixed. There should be no lumps left.
- Stir in the cherries. I like to cut the maraschino cherries that I used into very small pieces so that they are well distributed throughout the cheesecake filling. And then also mix in the mini chocolate chips.
Making the Crust
- In a medium bowl, mix all of the ingredients listed in the crust-section together. These include TVP, ground, flax goo, brown sugar, cocoa powder, salt, and flour. Personally, I just use a fork to mix all of this.
Assembly
- I used a 10 inch ceramic deep dish pie pan because we have a lot of filling. Dump the crust/dough into the pie pan and evenly smooth it out on the bottom of the pan and then up the sides. What I like to do is use the back of a spoon, and I kind of just start smashing the bottom and pressing the crust all the way up the sides. You should really try hard to make sure you have an even layer across the bottom and up the sides so that everything cooks evenly and you don’t have parts of the crust that are too thick.
- Add the cheesecake filling on top of the crust and smooth out evenly.
- Bake the cheesecake in the oven for 40 to 50 minutes. It should be pretty firm when it’s done, but it will have a slight jiggle left in the middle of the cheesecake.
- Once it’s done baking, let the Cheesecake cool at room temperature for about two hours. Once it is cooled to room, temperature, move it to the fridge to cool for another two hours until it is completely cooled down. This will help with the wiggly-ness and set the cheesecake up so that it can be cut cleanly. Trust me, the cooling down part is pretty important. I would know because I really have trouble letting stuff cool when I should 🙂
Silly Little Haiku
It’s not cursed as shit
TVP Cheesecake Crust rocks
High Protein Dessert!
Author

Protein Deficient Vegan

So good – this was what my husband requested for his Valentine’s day treat and it is amazing! Even some true tofu haters in my life said it was delicious!!
That makes me so happy!! I actually came up with this recipe as a Valentine’s Day treat for my husband too! I’m glad you liked it! 🙂