Nutrition
Ingredients
Cheesecake Filling
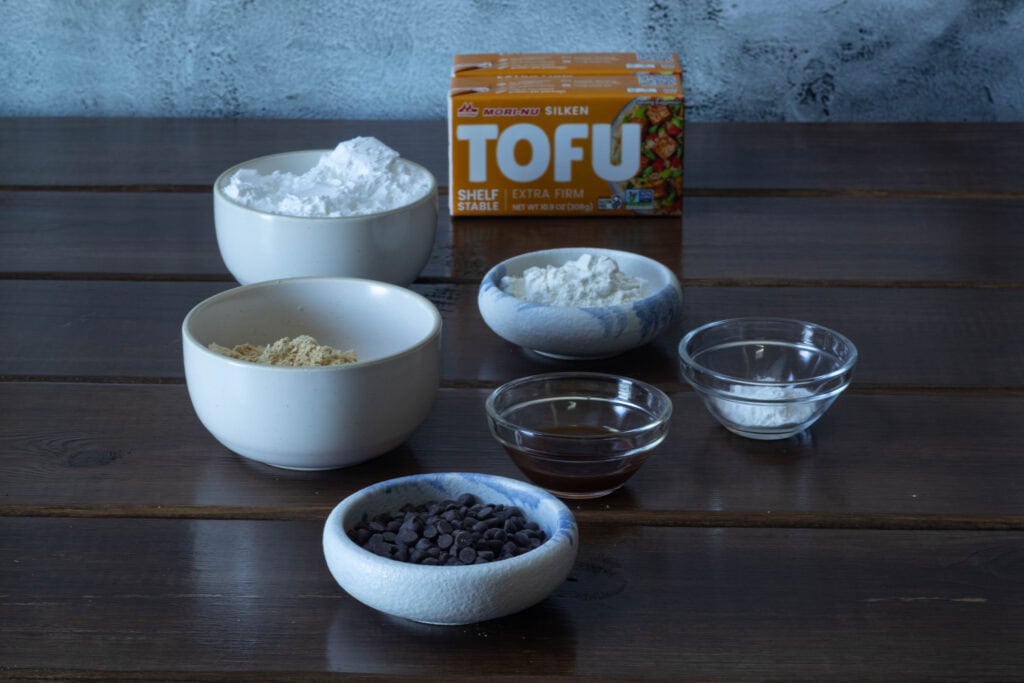
- 22 oz Extra Firm Silken Tofu 2 packs
- 1 cup Powdered Sugar
- 1 tbsp Vanilla Extract
- 1/4 cup Flour
- 1/2 tsp Baking Powder
- 1 tsp Salt
- 1/2 cup PB Fit Peanut Butter Powder
- 1/4 cup Mini Chocolate Chips I use Enjoy Life
Crust
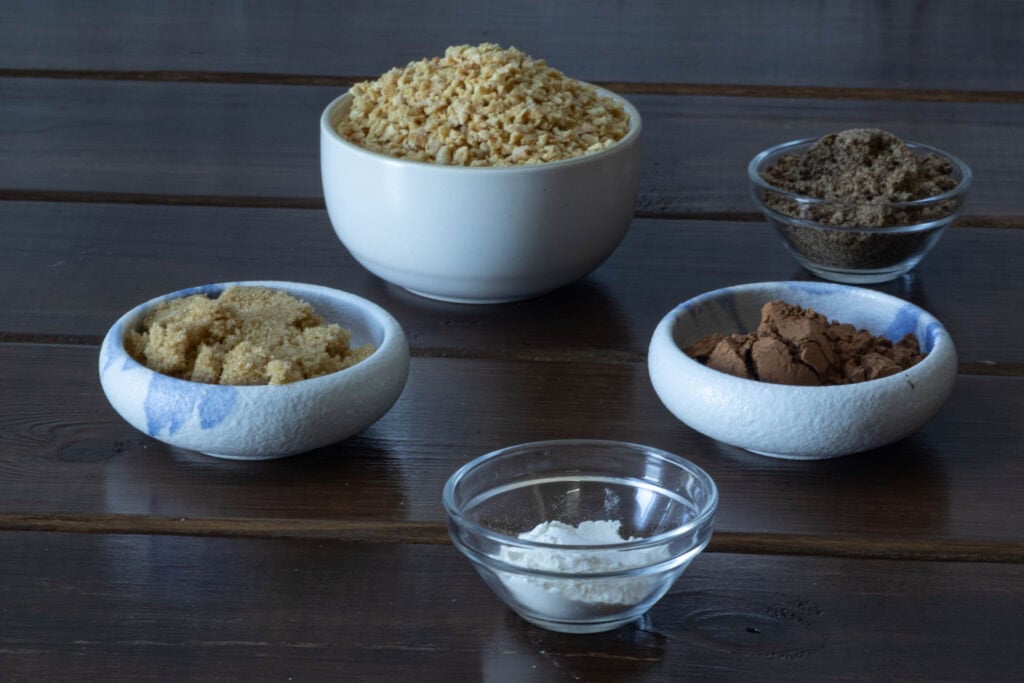
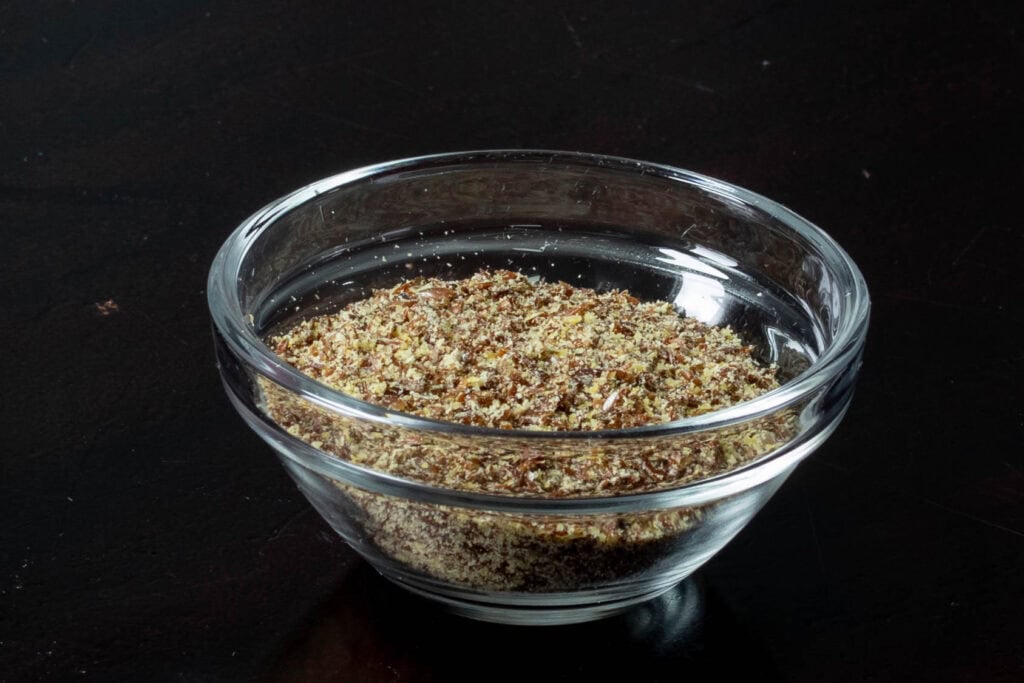
- 1 1/2 cup TVP Textured Vegetable Protein (I use Bob's Red Mill), do NOT re-hydrate TVP
- 3 tbsp Ground Flax Seed
- 9 tbsp Water
- 4 tbsp Brown Sugar
- 3 tbsp Cocoa Powder
- 1/4 tsp Salt
- 1 tbsp Flour
Instructions
- Pre-heat oven to 350 F (177 C).
- In a small bowl, whisk together 3 tablespoons of ground flax seed with 9 tablespoons of water. Let sit for a minimum of 5 minutes.
Making the Filling
- In a high powered blender, blend the tofu until very smooth and creamy.
- In a large bowl, pour tofu out of blender. Stir in the vanilla.
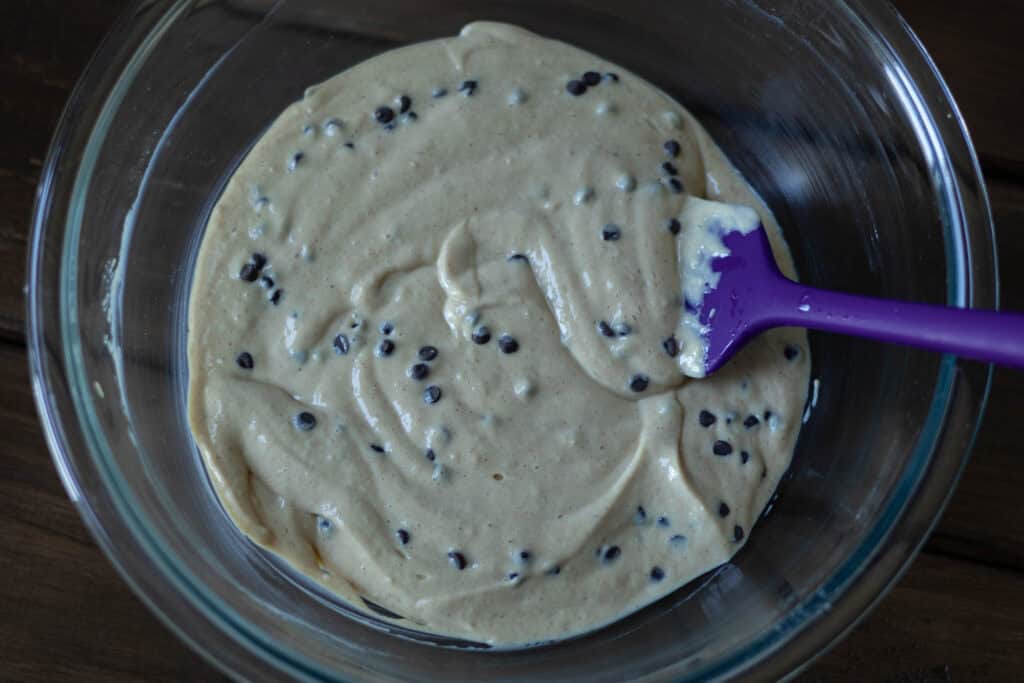
- Sift the powdered sugar and the PBFit into the bowl (if you don't have a sifter, you don't necessarily need to sift these ingredients, I just think it makes the filling creamier and smoother). Whisk together well.
- Add in the flour, baking powder and salt. Whisk together well until it is creamy and well mixed; there should be no lumps.
- Stir in the chocolate chips.
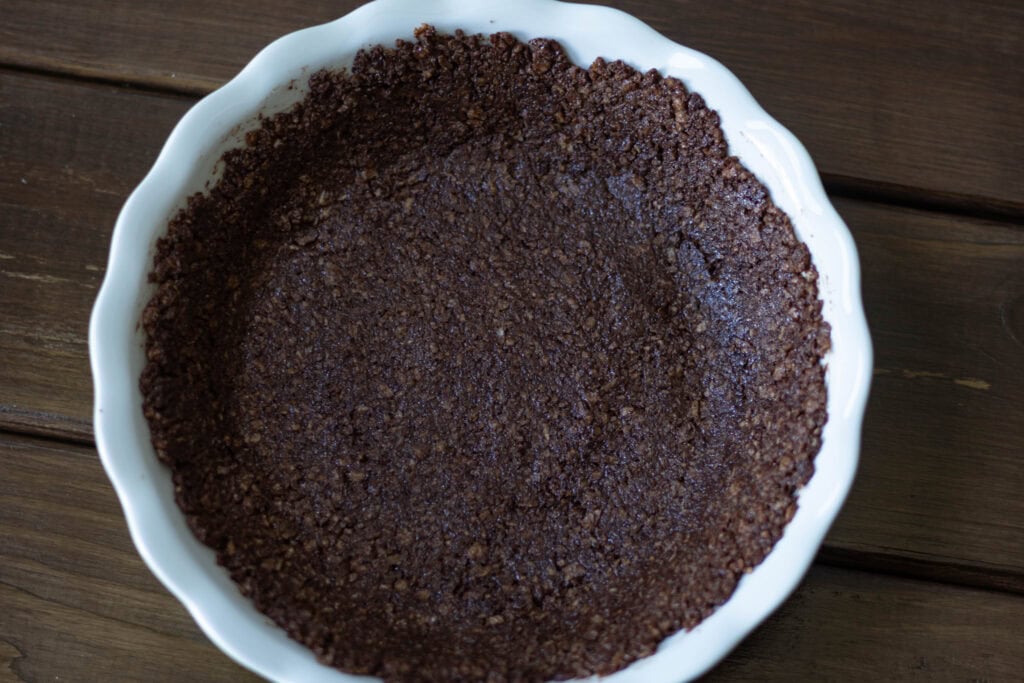
Making the Crust
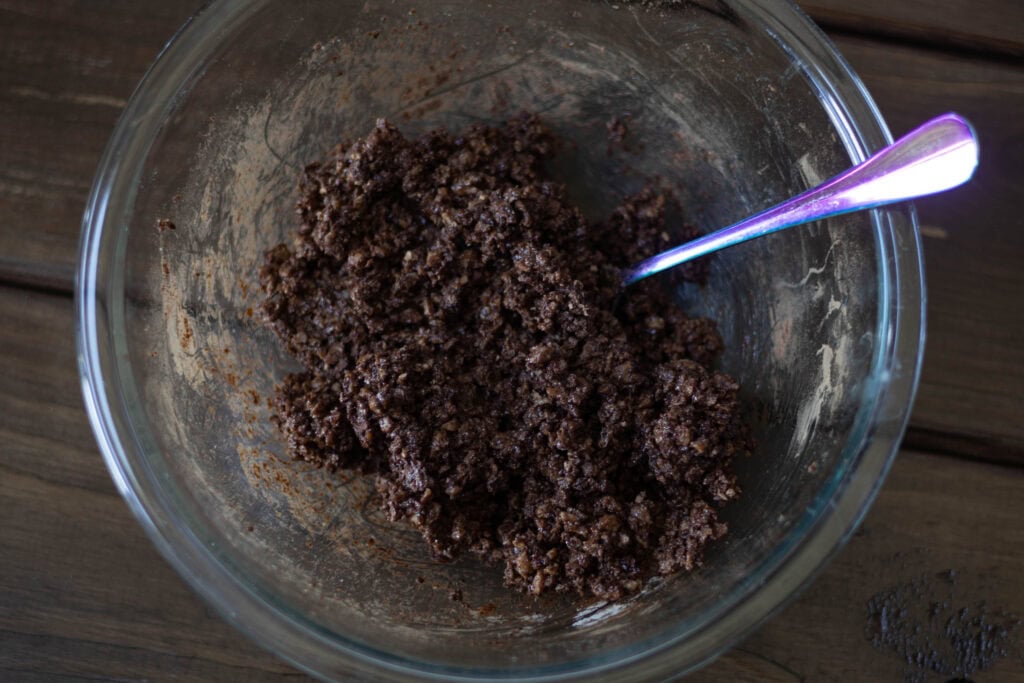
- In a medium size bowl, mix all of the ingredients listed in the crust section together. I literally just used a fork and make sure everything is very well mixed.
Assembly
- In you pie pan, dump your crust "dough" and evenly smooth it out on the bottom of the pan and up the sides.
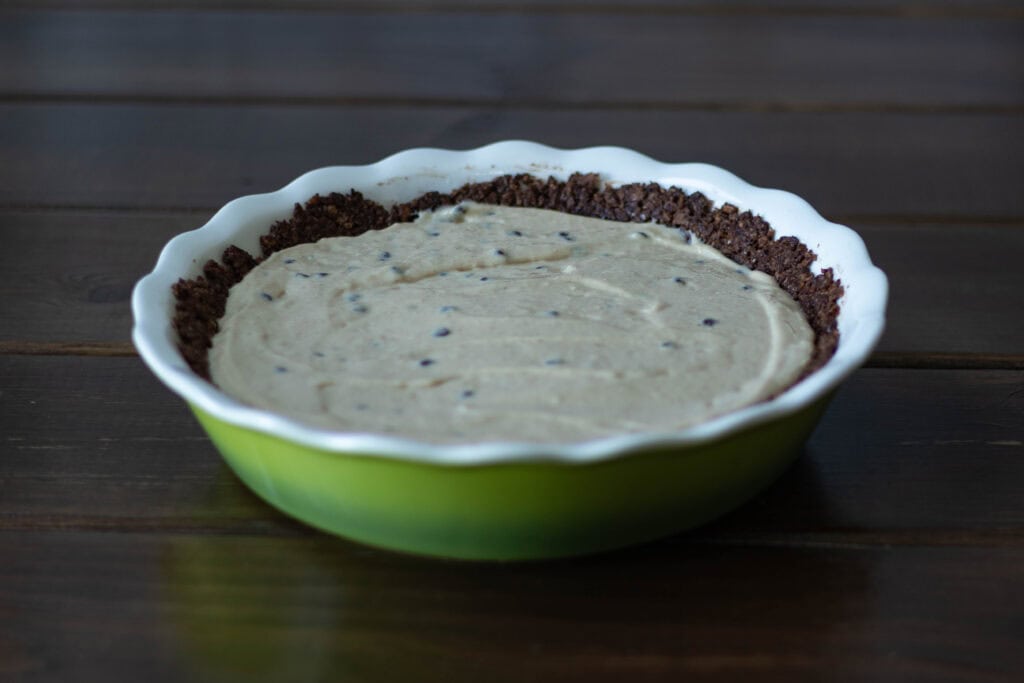
- Pour your cheesecake filling on top of the crust and smooth out evenly.
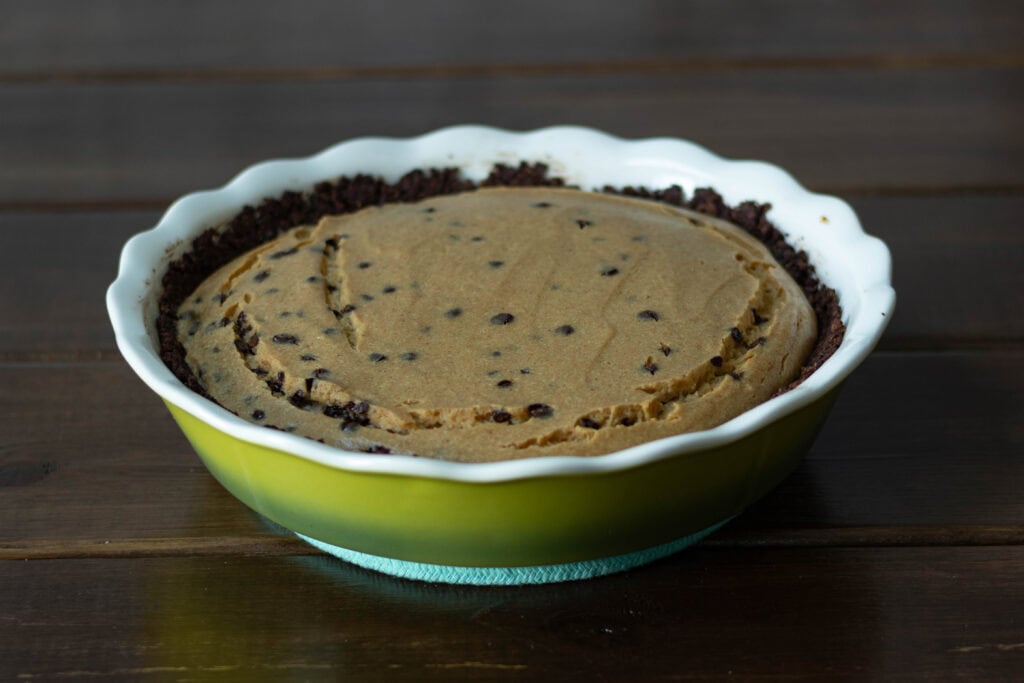
- Bake in oven for 40 – 50 minutes. Should be pretty firm when it's down with a slight jiggle left in the middle of the cheesecake.
- Let it cool at room temperature (on the counter) for 2 hours.
- Move to fridge for another 2 hours until completely cooled down. Then serve!
Equipment
This section may contain affiliate links

Notes
Gluten-free Option
- Use a 1:1 gluten-free flour (affiliate link) in place of flour. I’ve had good luck with this one for baking.
Reduced Sugar Option
- Use a 1:1 powdered sugar alternative (affiliate link) in place of the powdered sugar. I typically use this monk fruit option.
- Use a 1:1 brown sugar alternative (affiliate link) in place of the brown sugar. I typically use this monk fruit option.
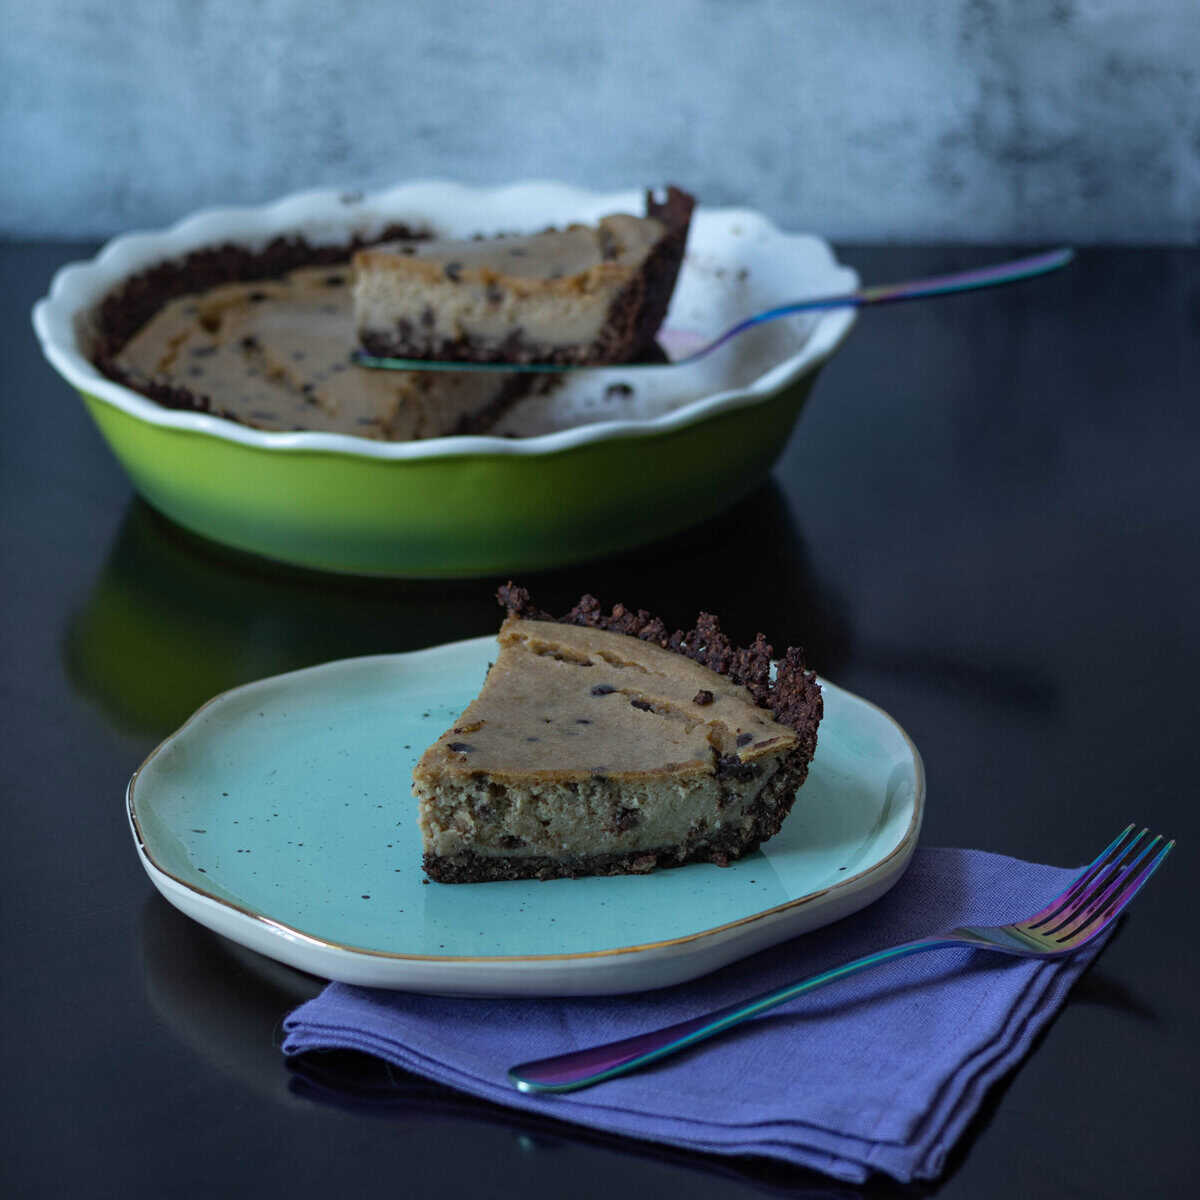
Have you ever tried a high protein cheesecake before? If you haven’t, here your sign! This is one of my favorite desserts I’ve made and you can pretty much fit it into any calorie/macro plan!
There are two main ingredients that make this cheesecake high protein – silken tofu and TVP! We use extra firm silken tofu for the cheesecake filling. Even if you’re not looking for a high protein cheesecake, I think silken tofu works best for a cheesecake filling – it stays moist and creamy! We use TVP for the cheesecake crust. That might sound really weird, and that’s because it is really weird. Honestly, most people aren’t using TVP for baking, but I think it works really well! If a TVP crust still seems a little too adventurous, you can definitely use a cookie crust for this – just mix some melted butter and crushed up Oreos or use a store-bought one!
If you’re looking for some other high protein desserts, be sure to check out my Triple Chocolate Cheesecake, Chocolate Seitan and “Rice” Crispy Treats!
Ingredients
Cheesecake Filling
- Extra Firm Silken Tofu – I like to use extra firm silken tofu for this recipe. It adds a decent amount of protein to the recipe, but, in general, I also think that a silken tofu base results in the best and creamiest cheesecakes. Silken tofu is different from regular tofu; I wouldn’t recommend using regular tofu (firm/extra firm) tofu for this, as it will basically turn into a hummus/ricotta texture when blended (assuming you can actually get it blend on its own lol). There are two different kinds of silken tofu – refrigerated and shelf-stable – both will work. I prefer the shelf-stable variety, specifically Mori-Nu. You can find it in most grocery stores near the International Food Isle (at least in the States), and you can also order it online.
- Powdered Sugar – I like to use powdered sugar for this recipe to add volume and creaminess to the cheesecake filling. I also like to sift the powdered sugar just to make sure it’s as powdered as possible and doesn’t have any chunks. You can probably use a sugar alternative, or maybe even sifted sweetened protein powder as a substitute for powdered sugar if you’re trying to cut back, but I haven’t tried this before so I can’t offer any specifics. If you do make substitutions, please put them in the recipe comments so that others can learn from your kitchen experiments!
- Vanilla extract – no such thing as too much vanilla.
- Flour – I used all purpose flour for this recipe. If you are gluten-intolerant, you could swap this for a gluten-free flour option. I don’t bake specifically gluten-free very often, so I don’t have a whole lot of advice to share, but if you happen to make this recipe gluten-free, I would love to know what you did and how it turned out!
- PB Fit peanut butter powder – I like the brand PB Fit for my peanut butter powder because the macros are slightly better. There’s another brand called PB2 that is also great. You can usually find at least one of these options at most grocery stores, and you can also buy these online. If you have a nut allergy, I have some other cheesecake recipes that don’t use peanuts, if you want to check those out! Or if it’s just a peanut allergy, PB2 makes an almond powder and a cashew powder that you could sub the peanut butter powder for! I’ve tried both and they are really tasty!
- Mini chocolate chips – I like to use Enjoy Life Mini Chocolate Chips, because it seems like with the minis, you get chocolate in every bite! Feel free to use whatever chocolate you like.
- Salt – adjust to taste.
- Baking powder – for the fluffiness.
Crust
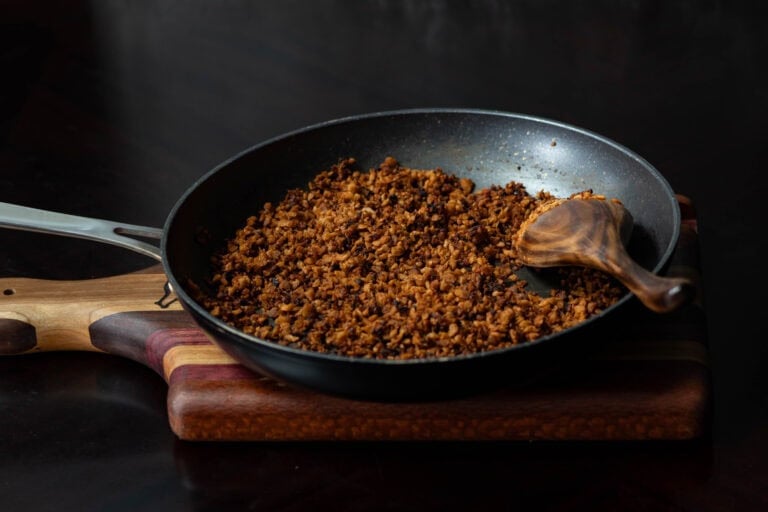
- TVP – Textured Vegetable Protein – if you’re new to vegan cooking, you may not have used TVP, or even if you’re a long time vegan – you still may not have used TVP. In the US, it’s usually called TVP or Textured Vegetable Protein, but I’ve also heard it called soy mince, textured soy, and some other names in different countries. So if TVP doesn’t sound familiar, it may just be called something different where you live. Either way, TVP is just de-fatted soy flour. It’s a shelf-stable protein source that is used a lot in vegan cooking. You can find this in most grocery stores near the gluten-free flour options and you can also buy it online. Usually TVP is re-hydrated before it’s used, but for this recipe, we will be using it dry.
- Ground Flax Seed – this will be our vegan egg substitute. I like it because it’s fairly cheap and easy to use.
- Brown sugar – I really like using brown sugar in the crust recipe, but if you’re trying to cut back on sugar, I think you could probably use some thing like flavored protein powder, or a different sugar alternative like date sugar or coconut sugar. I’ve only made it with brown sugar, so I don’t have any great recommendations here, but if you do make a reduced sugar version of this recipe, I would love to hear about it!
- Cocoa powder – I think the cocoa powder is really important for the crust recipe so that you get the chocolatey taste.
- Flour – we’re only using a little bit of flour in the crust recipe, but I did use all purpose flour. Feel free to substitute this for a gluten-free flour option.
- Salt – adjust to taste.
Instructions
- Preheat the oven to 350°F (177 C).
- In a small bowl, whisk together 3 tablespoons of ground flax seed with 9 tablespoons of water. We’re going to let this sit for at least five minutes until it turns into a gooey flax goo, which we will be using as our egg replacement!

Cheesecake Filling
- While you’re waiting on the flax goo to get gooey, blend the silken tofu in a high powered blender until it’s very smooth and creamy. This make require some spatula intervention!
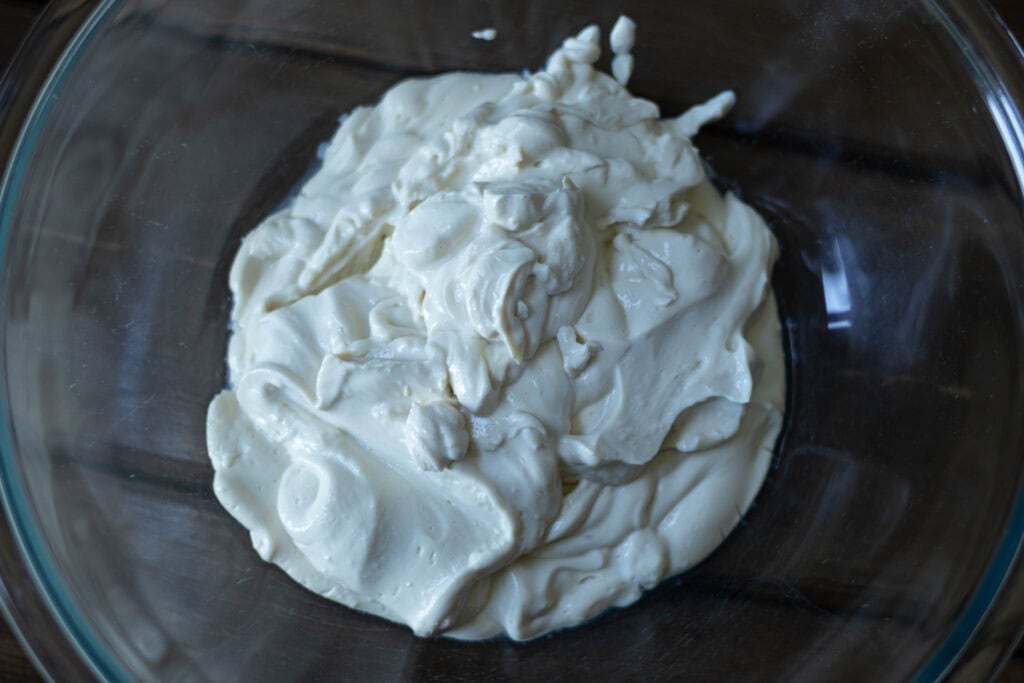
- Dump the blended silken tofu into a large bowl and stir in the vanilla extract.
- Next, sift the powdered sugar and the PB Fit Peanut Butter Powder into the bowl with your tofu. If you don’t have a sifter, you don’t have to sift these ingredients – I just think it makes the filling creamier and smoother. Either way whisk these together well!
- Add in the flour, baking powder and salt. Whisk all of these ingredients together well until they are very creamy and well mixed. There should be no lumps left.
- Mix in the mini chocolate chips.
Making the Crust
- So, if you have decided to skip the TVP crust, you can skip this step and just use a pre-made cookie crust or make your own cookie crust. For everyone else, let’s get weird!
- In a medium sized bowl, mix all of the ingredients listed in the crust section together – this includes TVP, ground flax seed goo, brown sugar, cocoa powder, salt, and, flour. This should end up pretty dry, similar to if you were making a cookie crust – it should be pliable, but not wet. Also, important note – DO NOT re-hydrate the TVP before using it! The flax “egg” and the filling on top will provide enough moisture to ensure the crust has the texture we want.
Assembly
- In a deep dish pie pan, you’re going to dump the crust dough and evenly smooth it out on the bottom of the pan end of the sides. When spreading the pie crust, I really like to use the back of a spoon, and just press everything together really well so that when you go to cut it later, it doesn’t crumble. TVP in a pie crust might sound kind of weird, but it actually works really well as far as how it holds up. Every time I’ve made it, it has always come out in really nice solid pieces, which is not always the case when you’re making pie crust. The taste is a pretty subtle chocolate, and I honestly prefer it to normal pie crust (but that could be because I’ve never like normal pie crust).
- Pour the cheesecake filling on top of the crust, and smooth it out evenly. It should fit pretty perfectly to the top of the pie crust. There’s a lot of it, which is why I recommend a deep dish pie pan.
- Bake the cheesecake in the oven for 40 to 50 minutes. It should be pretty firm when it’s done with a slight jiggle left in the middle of the cheesecake. You can’t really test this with a toothpick method, because it will set up as it cools, and you don’t want to overcook it or it won’t be moist and delicious. So how I like to check it is by literally jiggling it a little bit – make sure that the outside is not really jiggling (it should be fairly firm), but you should have a little bit of a jiggle left in the very center of the cheesecake and that’s how you know it’s done. And in my opinion, for this, I would rather have it a little bit under baked then over baked.
- The next step is waiting, which sucks, and I’m not very good at it. I would recommend leaving it to cool on the counter for about 2 hours. After that, decide if you want to eat it room temperature, or move it to the fridge to cool completely. It does seem to crack in the middle (IDK, science?) every time, but tends to be more crack-y if you immediately toss it into the fridge right out of the oven, so probably don’t do that.
Silly Little Haiku
TVP Pie Crust
We use the TVP dry
I swear it’s not bad
Author

Protein Deficient Vegan